FREE! An Email Newsletter Using ASP Smart Mailer and Advanced HTML Editor Support
Take a look at Matt Machell's latest tutorial where he describes how you can use Dreamweaver MX 2004 along with the DMXZone ASP Smart Mailer and Advanced HTML Editor extensions to produce a straightforward mailing list and newsletter application.
Well if you're in that situation, take a look at Matt Machell's latest tutorial where he describes how you can use Dreamweaver MX 2004 along with the DMXZone ASP Smart Mailer and Advanced HTML Editor extensions to produce a straightforward mailing list and newsletter application.
![]()
![]()
![]()
![]()
![]()
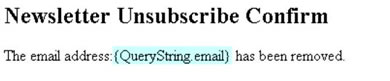
The Unsubscribe Confirmation
Open up mailshot_unsub_confirm.asp and add a new Binding of the Request type, with the type of Request.Querysting and the name of email. The unsubscribe confirmation page contains a brief message into which we put the email address that was forwarded as part of the URL.
You'll probably also want to add a link back to your main site beneath this.
The Sending Area
The sending area is split across four pages, and follows the following process:
· Login (mailshot_login.asp)
· Create Newsletter (mailshot_admin.asp)
· Preview/Send (mailshot_send.asp)
· Confirm Send (mailshot_done.asp)
Logging In
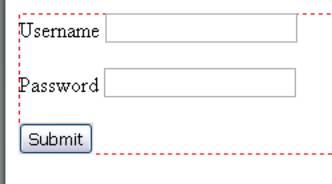
First off we want to create our login page. Open up mailshot_login.asp and create a basic layout including a form, two text fields and a submit button. Add two appropriate labels. Set the text fields to be called username and password.
In the Server Behaviors area of the Application panel hit, + > User Authentication > Log In User.
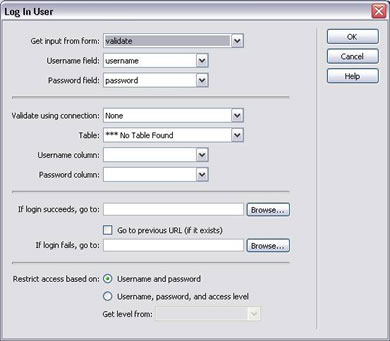
The dialog above will open up. If you named the form fields correctly, then the username and password fields should be correct. In the Validate using connection dropdown, select your database connection (I used the Jazz connection we created in a previous article).
Select the Table dbo.cms_users and for the columns for user information to be matched against select cms_user for username and cms_pass for password. If login succeeds should be set to mailshot_admin.asp and for simplicity If login fails should just redirect back to the login page.
With all your details filled in, click OK.
We now have a page that will log our administrator into the newsletter area if given the correct password, and act as a default page for anybody trying to access restricted pages.
Mailshot Admin Page
Our first page is a simple welcome page. Before adding any content go to the Bindings Panel, and Recordset. Go to advanced view and select the Jazz connection.
Add the following SQL:
SELECT count(id) as subscribers FROM dbo.cms_newsletter
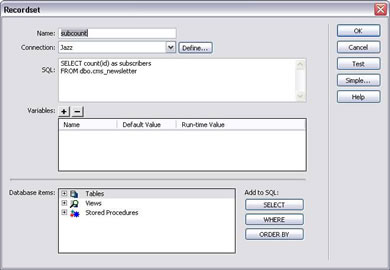
This SQL will tell us how many records are in the cms_newsletter table, and thus how many subscribers we have.
Add a basic welcome message to the page: "Welcome to newsletter admin, we have X subscribers"
Highlight the X and go to the bindings panel, highlight the subscribers column of our subcount recordset and click the Insert button:
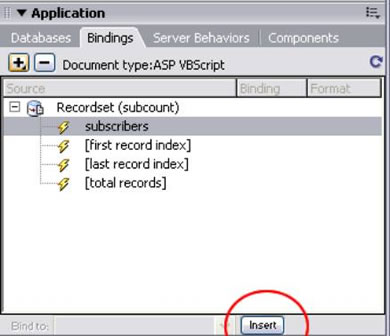
You should have a basic page something like this:
![]()
Now we get to the meat of the application. Add a brief explanatory note "use the form below to compose your newsletter" and then a new Form – I've called this newsletter.
Set the form to submit to mailshot_send.asp and set it to use the GET method (this is important, since the Smart Mailer behavior, we'll add later, detects any POST action as a signal to send). Add a text input field with the label "newsletter subject", with a form element name of subject.
Next add an Advanced HTML Editor element (in the Forms area of the Insert panel, see screenshot):
![]()
If this is the first time you've used an HTML Editor in making this site, you'll get a warning saying that files will be added to the site, and not to forget to upload them.
Set the Editor element to be called content, and set it to width 400 (we want it pretty small, since it's creating email content and most email clients use fairly small windows)
If you highlight the Editor (click on it), then in the Properties panel you can alter which options are available for the newsletter, see the following screenshot:
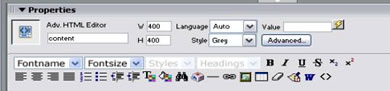
Which options you use are up to you, but remember that if you enable styles, then those styles must be stored in the body of the HTML for the newsletter, since email clients often don't support external stylesheets.
With the Editor set up, add a Submit button at the base of the form with a label of Preview.
The page is almost complete. The last thing to add is a behavior to stop just anybody sending a mailshot to everybody in our mailing list. In the Server Behavior's dialog hit + > User Authentication > Restrict Access to Page. A dialog like the one below will appear:
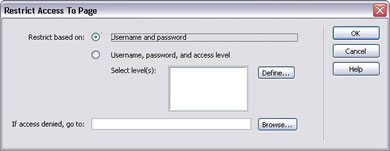
We'll just restrict on Username and password, set the access denied page to be mailshot_login.asp. Click OK and save the page.
![]()
![]()
![]()
![]()
![]()
Matt Machell
 A man of many talents, Matt has been a web designer, technical editor, and jewellery picker. He is currently on contract for the Birmingham City University, producing pages for research centres.
He has tech-edited a dozen books on web design and development for glasshaus, Apress and Sitepoint.
He likes music with loud guitars and games with obscure rules.
His website can be found at: http://www.eclecticdreams.com
He lives in Birmingham with his girlfriend, Frances, and a horde of spider plants.