Universal Data Exporter PHP Manual
Meet the DMXzone Universal Data Exporter PHP.
Ever wanted to offer your data in various formats for download? Meet the DMXzone Universal Data Exporter.
Now,
with just few clicks you can convert any recordset to Comma Separated,
Excel or PDF file for download! It's all done on the fly and no coding
is required what so ever


The Basics: Exporting an HTML table
Introduction
In this tutorial we will show you how to export your HTML
table to multiple formats using the Universal Data Exporter PHP.
How to do it
1. Define your site in Dreamweaver and Create a new page
Define your site in Dreamweaver and choose the option to create
an PHP page, you can read more about this at this page.
You should make a page that can be uploaded to your PHP server.
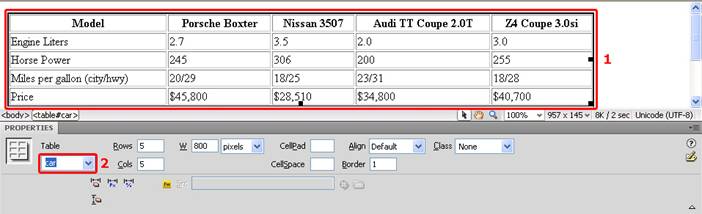
2. Create your table
Create a table. From the Common toolbar, select the "create a
table" icon and edit your preferences. In our case, our table will have 5 rows
and 5 columns. As it's a data table we only include a table header but no cell
padding or spacing as these are not supported.
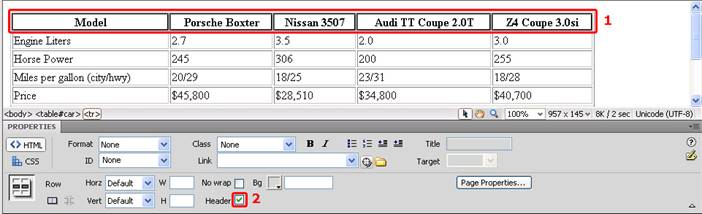
Select your table and give it a name in the property inspector.
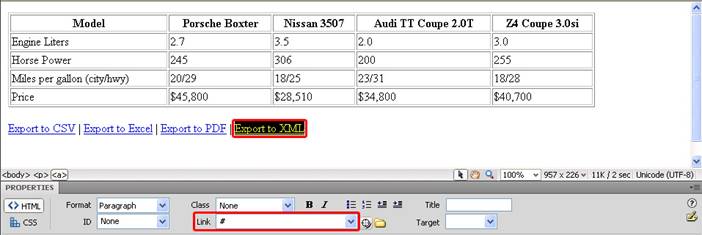
3. Add Links for Exporting your table
We make four basic links to export our table. Enter # in the link field. We
enter give them the following names: "Export to CSV", "Export to Excel", "Export
to PDF", "Export to XML".
- Using the Universal Data Exporter
Select the links one by one and choose Behaviors -> DMXzone ->
Universal Data Exporter
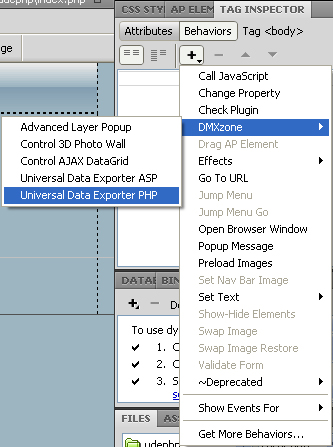
The Universal Data Exporter Interface
appears.
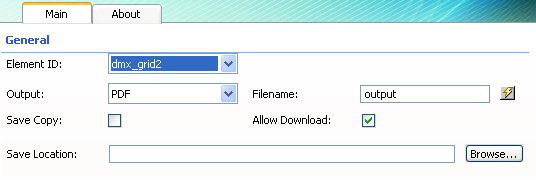
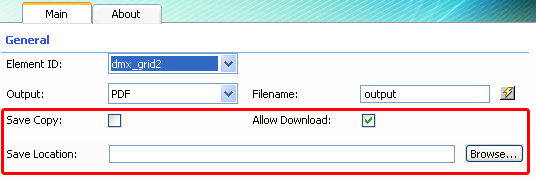
- Setting the General options
Select the Element ID drop down and choose the table name you've
specified in step 2.
If you are using an Ajax DataGrid instead of a regular table like we made
above, now there is new support for Ajax DataGrid. The Universal Data
Exporter recognizes the preferences you have edited in your Ajax DataGrid
and lets you select the ID of your particular grid in Element ID.
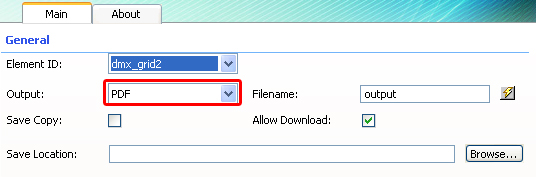
Choose the format that you want to export to in the Output options.
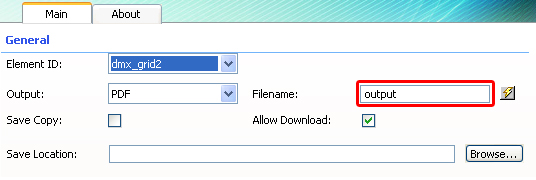
Enter the name of the file that will be offered when your data is
exported.
You can also press the lightning bolt and choose your file name according
to a column in the recordset. For example, if you have a column in you
recordset with the name of "photo" and you select it as your filename,
when your file is exported, it will be named "photo". We choose "output".
Here, you also have an option to Save Copy to the server
and/or to Allow Download. Another field, under those two, asks you
for the Save Location and you have the ability to choose where to save
your copy to. These are available for all Output formats.
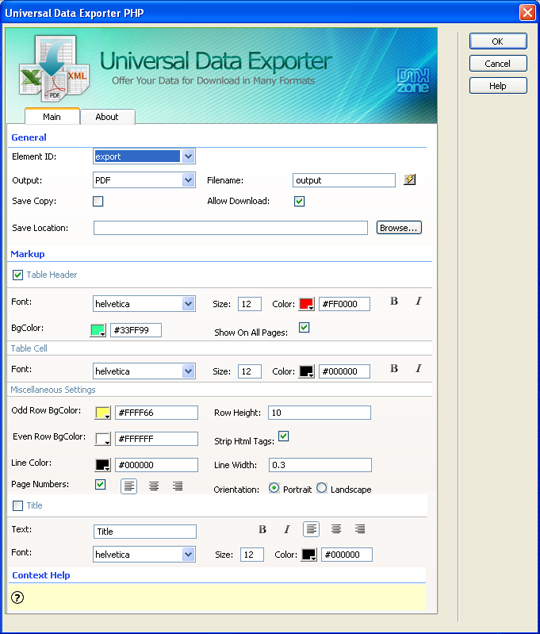
- Markup for PDF
If you've chosen PDF as the output format, you'll get the following markup
options:
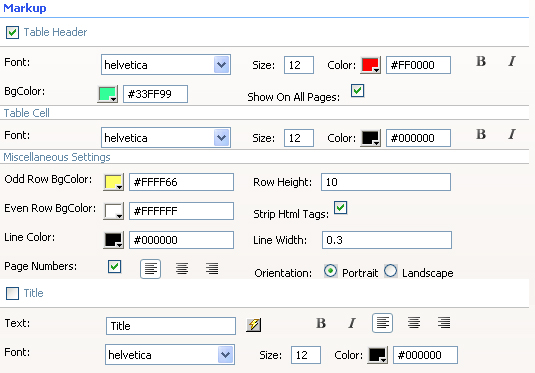
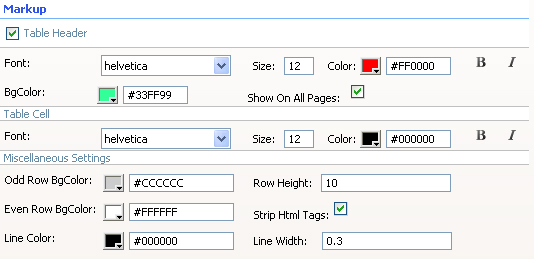
We check the Table Header checkbox to include the column names. We
leave the Font at Helvetica, leave the Size to 12,
set the Color to white (#FFFFFF) and enable the Bold and
Italic icons. We set the BGColor to blue (#0086be).

We leave the Font of the Table Cell at Helvetica, set
the Size to 10, leave the Color at black (#000000)
and leave the Bold and Italic icons disabled. We also
check the Show On All Pages option to display the header on all
pages.

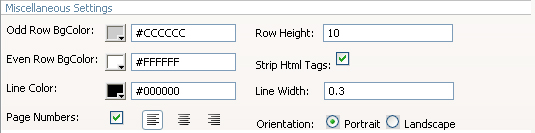
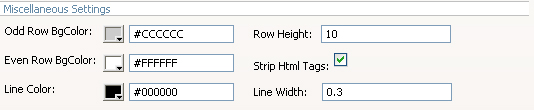
We set the Odd Row BGColor to light grey (#CCCCCC);
this way each odd row is colored grey. We leave the Row Height at 10;
this value sets the height of each row. We leave the Even Row BgColor
to white and the Strip HTML Tags option enabled to remove HTML
codes from the content (if there are any). We leave the Line Color to
black (#000000); this sets the color of the lines around your
cells. We set the Line Width to 0.3; this is the thickness
of the lines around your cells. We enable Page Numbers to display
the numbers of the pages. Set the Alignment of the page numbers to
right and the Orientation to Landscape to enable a layout
that is suited for wide tables.
We enable the Title checkbox to give our PDF a name; we name our
table "Car" in the Text entry field. We press the bold icon and
align it to the centre. We leave the Font at Helvetica and
set the Size to 16, we leave the Color to black (#000000).

You can also press the lightning bolt by the Text entry
field and choose your table name according to a column in the recordset.
For example, if you have a column in you recordset with the name of "photo"
and you select it, when your file is exported, your table name will be "photo".
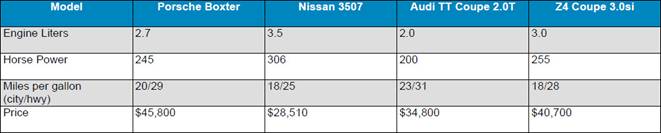
The settings above result in the following output (after pressing ok,
saving and previewing in the browser).
- Markup for CSV
Each output format has its own markup options. If you've
chosen CSV as the Output format you'll get the following
markup options;
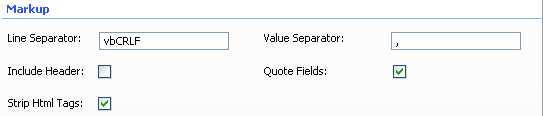
Line Separator defines which characters are used for a line break
(an enter), we'll leave it to \n. Value Separator sets the way the
values are separated. We won't change this either. We will enable the Include
Header checkbox to include the column names. We leave the Quote field
checked to enable quotes (for example: "Richard"). We leave the Strip
HTML Tags option enabled to remove HTML codes from the content (if
there are any).
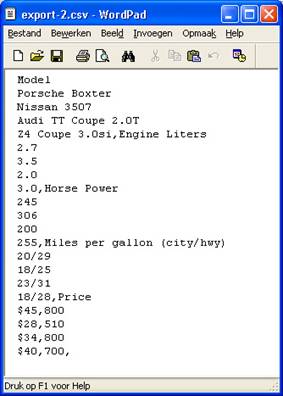
This results in the following output (after pressing ok, saving and
previewing in the browser).
- Markup for Excel
If you've chosen Excel as the output format, you'll get the
following markup options:
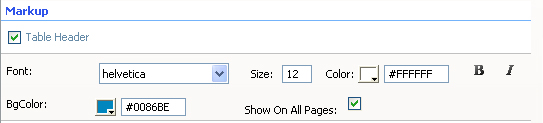
We check the Table Header checkbox to include the column names. We
leave the Font at Helvetica, and the Size to 12,
set the Color to white (#FFFFFF) and enable the Bold and
Italic icons. We set the BGColor to blue (#0086be). We also check
the Show On All Pages option to display the header on all pages.
We leave the Font of the Table Cell at Helvetica, set
the Size to 10, leave the Color at black (#000000)
and leave the Bold and Italic icons disabled.

We set the Row BGColor to light grey (#DEDEDE); this way
each odd row is colored grey. We leave the Row Height at 10;
this value sets the height of each row. Tip: if your row heights are
higher than the value set at Row Height then you need to increase
the Column width for the columns that have been wrapped because
they contain too much data. We leave the Line Color to black (#000000);
this sets the color of the lines around your cells. We set the Line
Width to 0.3; this is the thickness of the lines around your
cells. We leave the Strip HTML Tags option enabled to remove HTML
codes from the content (if there are any).
The settings above result in the following output (after pressing ok,
saving and previewing in the browser).

- Markup for XML
If you've chosen XML as the output format you'll get the following markup
options:

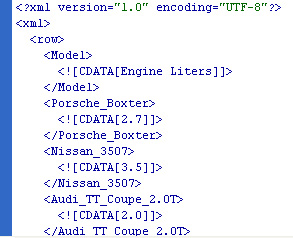
We leave the Root name to xml and the Row name to row to apply the default xml formatting. We leave the Strip HTML Tags option
enabled to remove HTML codes from the content (if there are any).
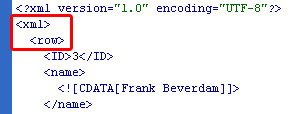
This results in the following output (after pressing ok, saving and
previewing in the browser, opening the file in Dreamweaver and using
Commands -> Apply Source Formatting).
DMXzone George Petrov is a renowned software writer and developer whose extensive skills brought numerous extensions, articles and knowledge to the DMXzone- the online community for professional Adobe Dreamweaver users. The most popular for its over high-quality Dreamweaver extensions and templates.
George is also the founder of Wappler.io - the most Advanced Web & App Builder
See All Postings From George Petrov >>