Explore the Premium Content

Creating a Flash portfolio movie – part 2

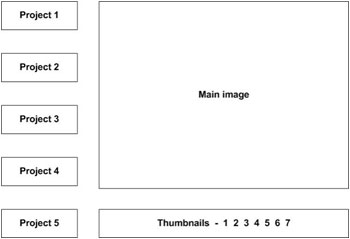
This is part 2 of a tutorial about building a Flash portfolio movie using an AS 2.0 class. We’re building a movie that has the following layout:


The movie takes its contents from an XML file, portfolio.xml. That file provides a list of projects and the images associated with each. When you click a project button, a list of images appears at the bottom. You can click one of these links to load an image into the main image area.

At the end of the last tutorial, we’d created the class file and set up the interface. By the end of this tutorial, you’ll have populated the interface from the XML file and you’ll have created a working application. During the tutorial, you’ll learn some useful coding techniques for working with XML data in class files. Remember that the resource files are created in Flash MX 2004 so you’ll need at least this version to finish the tutorial.

You can download the resource files for this tutorial from the blue Properties box that contains the article PDF. There's a heading titled Code Download and you can click the Details link next to it to get the zip file.

Note: If you have difficulties downloading the source files or PDF, you might have a problem with your cookies. Delete the cookies from your machine and try again. In Internet Explorer, you can do this by choosing Tools > Internet Options... and clicking the Delete Cookies... button on the General tab.

Read More

Configure your Flash Applications using XML – Part Two

In the previous article on using configuration XML files in Flash we looked at using the XML file to overwrite default values in your Flash application. That’s a great way to get started but there is of course much more you can do with configuration files.

In this article I’ll show you some methods that allow you to change the configuration parameters at runtime and update the XML file using PHP.

Read More

Working with graphic filters

Filters and blends are two of the exciting new features that are available in Flash Professional 8. You’ve probably seen both of these features in software packages like Fireworks and Photoshop and both can be used to create special effects in your movies. This article will cover the filters that you can use in Flash Professional. In the next article, I’ll look at working with blend modes. Later articles will show you how to work with these features using ActionScript.

Flash Professional 8 includes seven filters: Drop Shadow, Blur, Glow, Bevel, Gradient Glow, Gradient Bevel and Adjust Color. I’ll cover these filters in detail within this article. We’ll work through some examples so you can see how you might use these filters in your work.

In addition, there are three other filters that are available only through ActionScript - Convolution, ColorMatrix and DisplacementMap. You’ll find out more about those filters in a later article.

You’ll need a copy of Flash Professional 8 to see the filters covered in this article.  You can download a trial version of the software from the Macromedia Web site.

Download the source files for the tutorial from the blue Properties box that contains the article PDF. There's a heading titled Code Download and you can click the Details link next to it to get the zip file. The download includes the starter files you'll need as well as the completed files.

Note: If you have difficulties downloading the source files or PDF, you might have a problem with your cookies. Delete the cookies from your machine and try again. In Internet Explorer, you can do this by choosing Tools > Internet Options... and clicking the Delete Cookies... button on the General tab.

Read More
FREE

Free! - Configure your Flash application using XML

Configure your Flash application using XML

If you’re anything like me, you don’t particularly enjoy having to launch Flash for a quick little fix, export again and deploy it on a website.

Well using the power of XML you can make your life a lot easier. What I’ll be discussing in this article is the concept of a configuration XML file and how to use it most efficiently for your Flash projects.

Getting started

What exactly is a configuration XML file I hear you saying? It’s not difficult at all; in simple terms what it does is define some properties and corresponding values that overwrite the default values in your Flash application.


Let’s look at an example of such an XML file:

<?xml version="1.0" ?>

<config>

  <param id="companyName" value="DMXzone" />

  <param id="companyLink" value="http://www.dmxzone.com" />

</config>

The XML file above shows a typical configuration XML file that allows you to change the companyName and companyLink variables without having to recompile the Flash application.

This XML document is saved as config.xml and placed in the root folder of your Flash application. Of course that’s not enough to get it to work; we need a little bit of code in the Flash application to load in the XML and get hold of the configuration parameters which we’ll look at next.

Read More

Creating a Flash Portfolio movie – part 1

A few weeks ago, a reader asked how to create a portfolio movie in Flash. Because this is a common request, and the reader had a specific layout in mind, the team at DMXZone thought it might make a good subject for a tutorial. We’ll build a portfolio web site that has the layout shown below.


Read More

An Online Presentation Application With Flash Communication Server MX – part 2

Introduction:

This is 2nd part of this series of articles targeting the steps required to create an online presentation application with Adobe’s (formerly Macromedia Inc.) Flash Communication server 1.5. In the last episode, we learnt how to make a simple presentation application that enabled the presenter to show Jpeg slides to, deliver speech/information about the slides and the users could interact through a text chat.

The general rule in such applications is the greater the number of users, the greater the load on the server and if the application are flooded by un-invited users, then the application may suffer performance issues. In order to avoid this problem, we will learn how to avoid non-invited users by giving access to a select group of users.

Read More

Working with blends

In the previous article, I showed you how to work with the new Filters feature in Flash Professional 8. They allow you to create some amazing effects on your movie clips, buttons and text fields. In this article, I’ll cover the Blend Modes that you can find in Flash Professional 8. As with the filters, you may have seen blends in software packages like Fireworks and Photoshop. Flash doesn’t offer the same range that you’d find in PhotoShop, but you’ll be surprised at the great effects that you can achieve with the blend modes that are available.

Blends allow you to combine the colours in overlapping objects to achieve different visual effects. Flash Professional 8 includes the following blend modes: Normal, Layer, Darken, Multiply, Lighten, Screen, Overlay, Hard light, Add, Subtract, Difference, Invert, Alpha and Erase. I’ll look at each of these blend modes and show you some examples at the end of the article.

You’ll need a copy of Flash Professional 8 to see the filters covered in this article. You can download a trial copy from the Macromedia Web site.

Download the source files for the tutorial from the blue Properties box that contains the article PDF. There's a heading titled Code Download and you can click the Details link next to it to get the zip file. The download includes the starter files you'll need as well as the completed files.

Note: If you have difficulties downloading the source files or PDF, you might have a problem with your cookies. Delete the cookies from your machine and try again. In Internet Explorer, you can do this by choosing Tools > Internet Options… and clicking the Delete Cookies… button on the General tab.

Let’s get started with an introduction to each of the blend modes.

Read More

Printing in Flash

Printing in Flash

In earlier versions of Flash, printing out your movies was really hard work. Flash MX 2004 introduced the PrintJob class which gave us much more control over printing. It also made the process a whole lot easier.

You can use the PrintJob class to print the Stage from your Flash movie or you can set up movies made especially for printing. These special print movies don’t need to be visible within your main Flash document and they can even be located on a different frame. It’s also possible to create the print movie clip and load the content entirely in ActionScript, before you print it out.

In this tutorial, I want to show you how to get started with the PrintJob class. We’ll look at how you can use it to print the Stage from your Flash movie and then we’ll print out a movie clip that isn’t visible in the published SWF file.

Because the PrintJob class was introduced in Flash Player 7, you’ll need to have at least Flash MX 2004 to complete this tutorial and you’ll have to target Flash Player 7 and above when publishing. You can download the resource files for this tutorial from the blue Properties box that contains the article PDF. There's a heading titled Code Download and you can click the Details link next to it to get the zip file.  The zip file includes the starter Flash file, a text file that we’ll load and my completed file.

Note: If you have difficulties downloading the source files or PDF, you might have a problem with your cookies. Delete the cookies from your machine and try again. In Internet Explorer, you can do this by choosing Tools > Internet Options… and clicking the Delete Cookies… button on the General tab.

We’ll start off by looking at the PrintJob class.

Read More

Working with the Flash 8 Video Encoder

In the previous article, we looked at the updated Import Video Wizard in Flash Professional 8. We used it to embed video clips in a Flash movie. You saw how we could edit the video clip before importing it and how we could add the video to a movie clip so we could write ActionScript to play it.

As I mentioned in the previous article, Flash Professional 8 includes a new codec, the On2 VP6 video codec, which you can use with video that you’re going to publish to Flash Player 8.  If you’re publishing to Flash Player 7, you have to use the Sorenson Spark codec.

In this article, I want to look at working with the Flash 8 Video Encoder. This is a standalone application that allows you to encode video into FLV format. The application allows you to work with more than one file at a time. If you do a lot of work with video, you could install it to another computer dedicated to encoding FLV files.

You’ll need a copy of Flash Professional 8 to see the features covered in this article. If you haven’t bought it yet, you can download a trial copy from the Macromedia Web site. You should also install Flash Player 8 so you can use the new video codec.

You can download the files referred to in the tutorial from the blue Properties box that contains the article PDF. There's a heading titled Code Download and you can click the Details link next to it to get the zip file.

Note: If you have difficulties downloading the source files or PDF, you might have a problem with your cookies. Delete the cookies from your machine and try again. In Internet Explorer, you can do this by choosing Tools > Internet Options… and clicking the Delete Cookies… button on the General tab.

Read More

Getting Started with Flash Lite

You probably know that Flash is available on all sorts of devices, not just computers. You can use Flash on devices such as PDAs, mobile phones and DVD players. Flash Lite is the version of Flash that works with mobile phones. You can use it to create wallpapers, screensavers, games and applications that will play on some mobile phones.

Because mobile phones don’t have the power of a computer, Flash Lite is a cut down version of Flash. You can find out more about it at http://www.macromedia.com/software/flashlite/. Flash Lite comes in three different versions – 1.0, 1.1 and the newly released 2.0. Flash Lite 2.0 works includes support for video and XML. However, authoring tools for this version aren’t yet available. In this article, we’ll work with version 1.1.

Not all devices support Flash Lite but you can find a complete list of those that do at http://www.macromedia.com/mobile/supported_devices/. In general, many of the phones available in Japan support Flash Lite. Symbian Series 60 phones and Symbian UIQ phones also support Flash Lite.

Flash Professional 8 comes with several different options for working with Flash Lite. The Flash Lite emulator allows you to preview your content to see how it will appear in the mobile phone and there are a number of templates to start you off.

You can download the resource files for this tutorial from the blue Properties box that contains the article PDF. There's a heading titled Code Download and you can click the Details link next to it to get the zip file. I’ve shown how Flash Lite 1.1 works with Flash Professional 8, but you can use earlier versions of Flash.

Note: If you have difficulties downloading the source files or PDF, you might have a problem with your cookies. Delete the cookies from your machine and try again. In Internet Explorer, you can do this by choosing Tools > Internet Options… and clicking the Delete Cookies… button on the General tab.

Read More

Christmas eCard, part II – Sending and Viewing

Introduction

In the previous article of the series we have built the functionality required for composing our Christmas eCard. Today we will complete the application and build the functionality for sending as well as viewing the received card.

You won’t need a database to store eCard information; instead it will be passed to the URL containing the eCard viewer Flash movie in a query string. A server-side page will extract all the parameters from the query string and pass them to Flash.

Before attempting to send the card to the recipient we will validate user’s input.
For this task we will utilize the new Flash 8 External Interface class while putting to work JavaScript regular expressions feature.
Please note that version 8 of Flash application is required to complete this tutorial.

Read More

Working with video in Flash Professional 8

Flash Professional 8 includes a range of changes to the way you can work with video. These include a new standalone package called the Flash 8 Video Encoder. There are also changes to the Import Video Wizard and a new codec, the On2 VP6 video codec, for exporting video.

In this article, I want to look at embedding video with the Import Video Wizard. I’ll show you how you can use this Wizard to add video to a Flash movie. In the next article, I’ll show you how to use the Flash Video Encoder and we’ll work with the FLV video format.

You’ll need a copy of Flash Professional 8 to see the features covered in this article. If you haven’t bought it yet, you can download a trial copy from the Macromedia Web site. You should also install Flash Player 8 so you can use the new video codec. Note that the code samples within the article all use AS2.0.

You can download the files referred to in the tutorial from the blue Properties box that contains the article PDF. There's a heading titled Code Download and you can click the Details link next to it to get the zip file.

Note: If you have difficulties downloading the source files or PDF, you might have a problem with your cookies. Delete the cookies from your machine and try again. In Internet Explorer, you can do this by choosing Tools > Internet Options... and clicking the Delete Cookies... button on the General tab.

This article is part of the new interactive e-book; Out of my mind: Flash 8 Power

Read More
Newer articles Older articles